
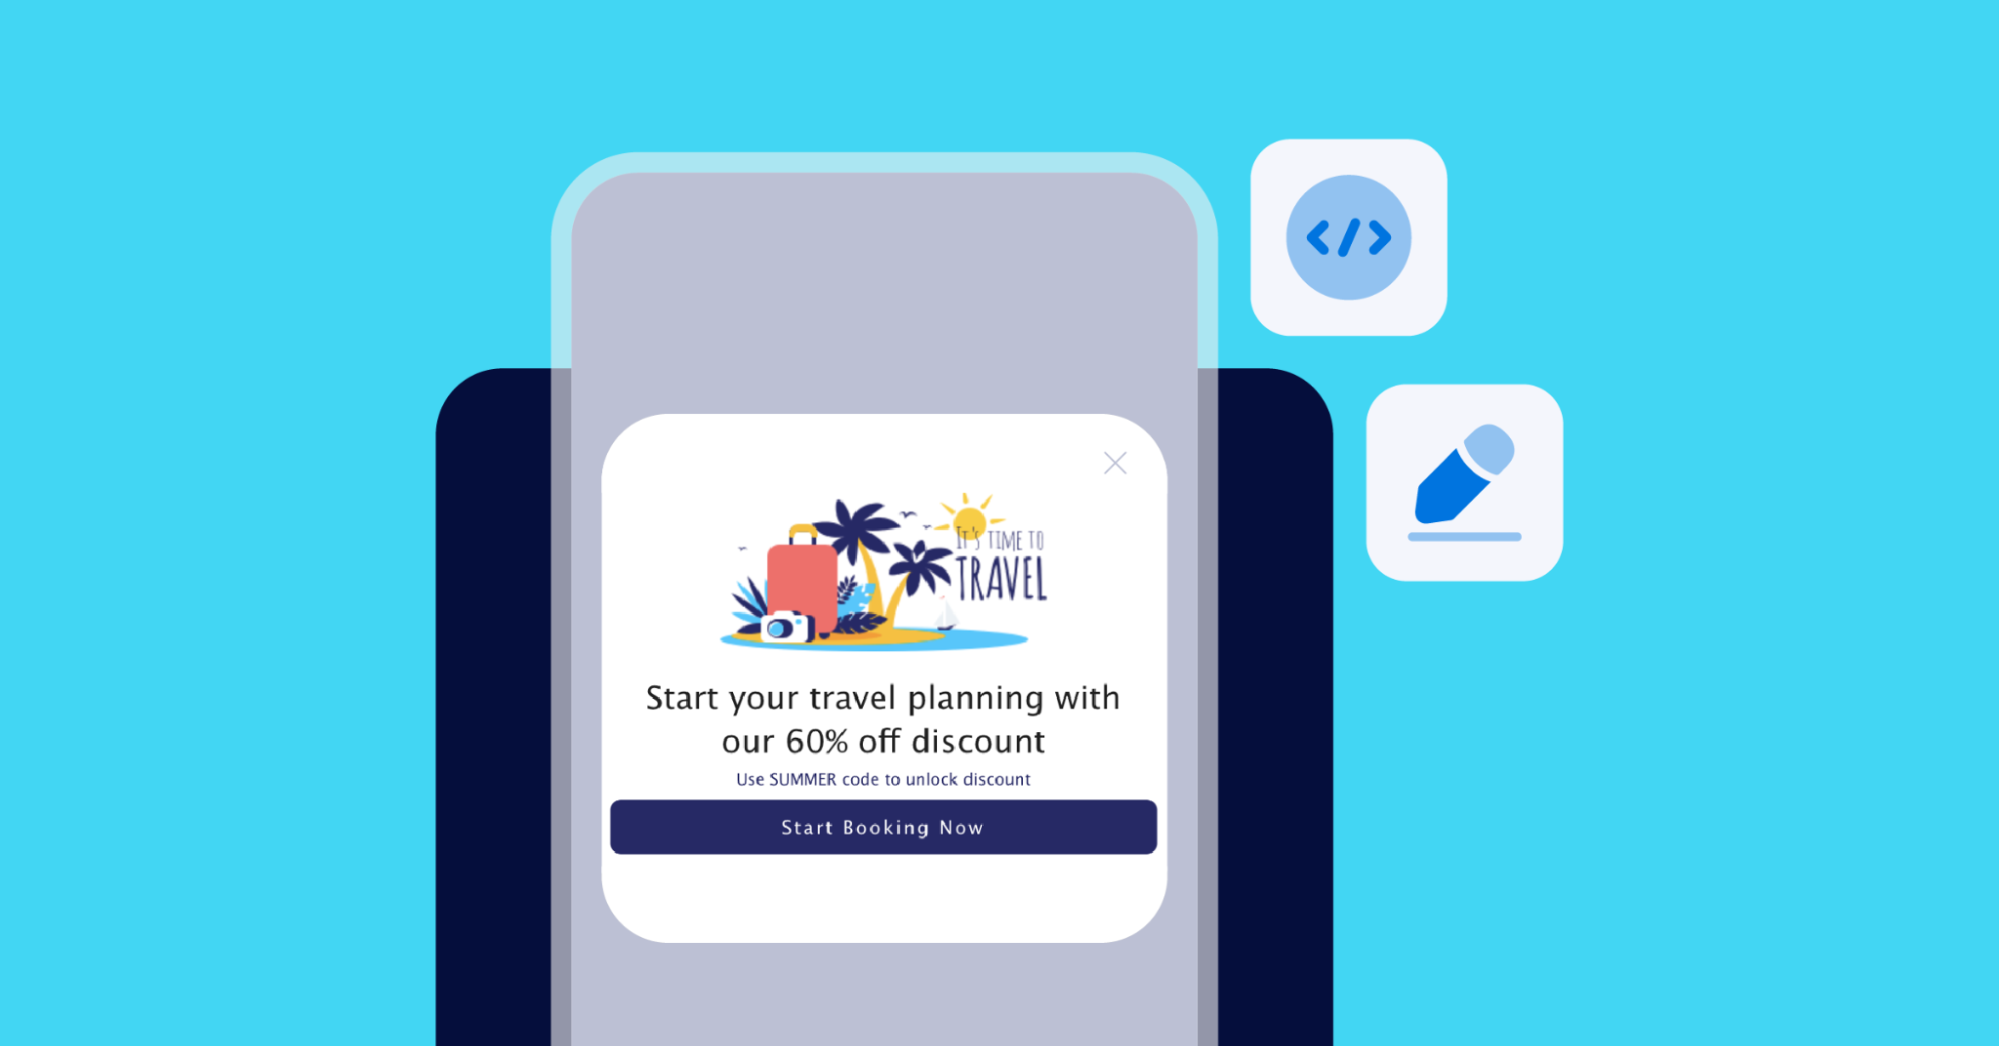
The Department dashboard supplies a fundamental WYSIWYG view editor that permits you to change the colour, measurement, and orientation of the important thing components that make up a Journeys good banner. On the similar time, harnessing the facility of Department’s CSS editor device provides you way more flexibility and granular management over each facet of your banner. This lets you maximize the potential of good banners and attain your person acquisition and reengagement objectives.
For CSS refresher assets, I extremely suggest W3Schools. The positioning has a variety of examples on utilizing CSS. It additionally provides you hands-on observe writing CSS code within the browser-based editor.
The CSS editor
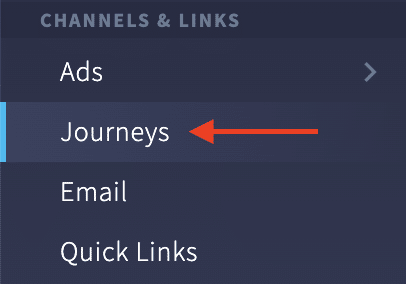
Right here’s work with Department’s CSS editor for Journeys banners. First, yow will discover the Journeys part underneath Channels & Hyperlinks within the Department Dashboard.
Subsequent, go to the Supervisor tab, which is able to open the Journeys supervisor. You possibly can both select to edit an current banner or create a brand new banner.

After deciding on the artistic on your banner, a preview will show together with one other set of tabs. By default, you’ll land on the View Editor tab, which lets you choose banner components and customise them utilizing the UI. Nevertheless, to get probably the most flexibility in customizing your Journeys banner, we suggest utilizing the CSS Editor tab.

Right here you’ll discover the CSS code. Earlier than you start customizing a banner, let’s overview the assorted parts that make up its anatomy. This may increasingly assist you to acquire a greater understanding of the weather you’ll need to work with when customizing a Department banner.
Anatomy of a Department Journeys banner
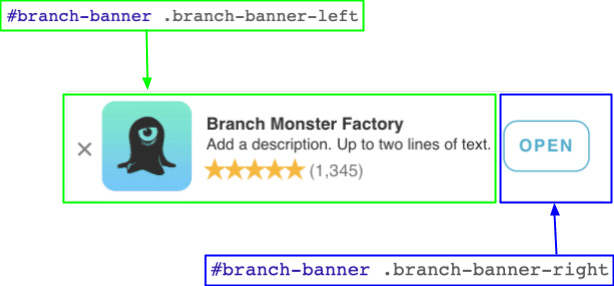
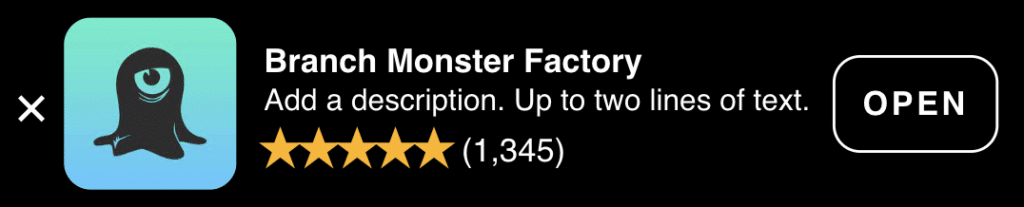
A banner is made up of two foremost teams: a category named branch-banner-left/ and a category named branch-banner-right. The branch-banner-left class incorporates components just like the shut button, icon, title, description, stars, and critiques. The branch-banner-right class consists of the CTA button. You will need to word that any adjustments you make to the kinds of those courses will have an effect on all youngster components.
Other than these two courses, a Department banner consists of the next foremost components:
branch-banner-closespecifies the model for the x button, which dismisses the banner when the person faucets it.branch-banner-iconis the container for the app icon, andbranch-banner-iconimg is the precise picture for the icon.branch-banner-titleis the title displayed on the Department banner, which is the default identify of your app. On this instance, the title is Department Monster Manufacturing facility. It’s a pattern Department app obtainable as a demo of our SDK’s performance.branch-banner-descriptionis the outline displayed underneath the title. On this case, it reads “Add an outline. As much as two strains of textual content.” As this placeholder textual content signifies, an outline could include as much as two strains of textual content.branch-banner-starsis the star ranking graphics. Observe: these don’t replace robotically, so it’s good to manually replace the celebs to mirror your Play Retailer or App Retailer ranking.branch-banner-reviewsis the textual content in parenthesis for the variety of critiques the app has. It additionally must be up to date manually.branch-banner-buttonis the CTA button.

Now that you’ve an understanding of the assorted components that make up a Department banner, let’s dive into customise it utilizing CSS code.
Utilizing CSS to customise a Department banner
Let’s look at programmatically change the colour of the weather. For instance, we will change the background of the banner to black. To do that, we navigate to the branch-banner-content factor and alter its background worth from white to black.
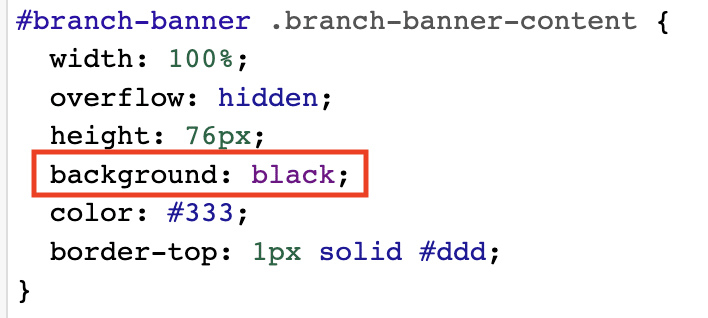
Discover that this makes a few of the darker components, just like the textual content, more durable to see. To treatment this, change the colour of the shut button (branch-banner-close), title textual content (branch-banner-title), description textual content (branch-banner-description), button (branch-banner-button), and critiques textual content (branch-banner-reviews) to white.
![]()
Now your banner has a black background with white textual content components, due to the CSS code you edited.
That is simply scratching the floor of what’s doable. For instance, let’s say you wish to programmatically change the app icon. Step one is to search out a picture on-line, proper click on, and select Copy Picture Handle to repeat the URL to the picture.
For this instance, use this URL that factors to a Department icon: https://play-lh.googleusercontent.com/Mo4DV_61Wy5LP_dpiC2LiH5Nq3a26bOqHDypJh5WmuQhtdj1LkrRTVs4LEg_0X4f=w240-h480-rw.
Subsequent, go to the img factor for the branch-banner-icon and add a content material property that specifies a URL with the worth you copied.

After you write this line of CSS code, discover that the app icon modified to mirror the edits you made.

An much more superior use case is utilizing CSS to animate Journeys banners. Some clients have requested about animating their banners, and a few have even used GIFs to take action. Whereas this strategy works, a extra performant and scalable resolution is to animate the banner components immediately utilizing CSS code.
Animated Journeys with CSS
Listed below are some examples of animate a banner with CSS. This primary instance is a pulsating CTA button. It’s a extra refined animation that can be utilized to seize the person’s consideration and immediate them to both set up or open the app on their machine.
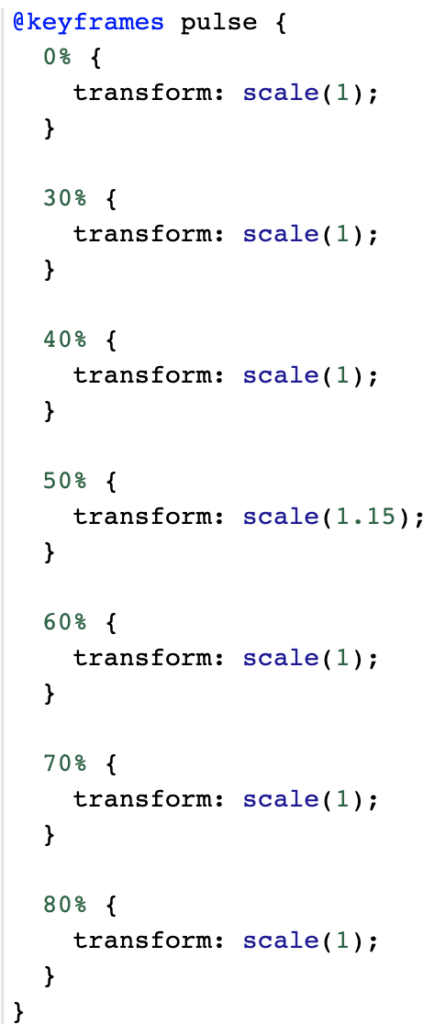
Step one is to create the animation. You should use the @keyframes rule to create a keyframe animation, which you’ll identify pulse. Set the rework’s scale to 1 at a timing of 0%, 30%, and 40%.. At 50%, set the size to 1.15, after which at 60%, 70%, and 80%, set the size to 1.
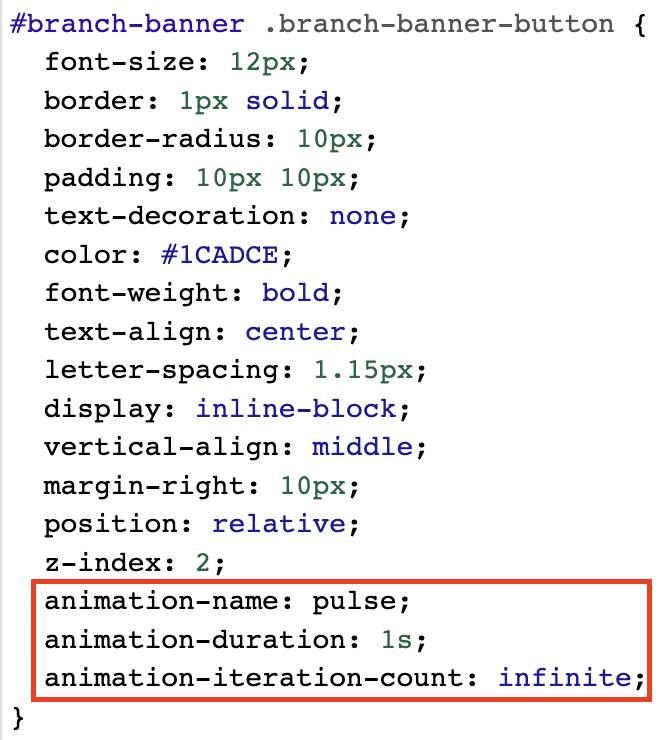
Now you’ve written the code to animate the heartbeat impact, however you’ll nonetheless want to use it to the CTA button. To do that, navigate to the branch-banner-button. On the finish of this code, specify an animation-name of pulse, an animation-duration of 1 second, and an animation-iteration-count of infinite so the animation loops indefinitely. When you’ve made these edits, it’s best to see the button pulse animation preview on the left aspect of the CSS editor the place your banner is displayed.
One other instance of making an animated banner is to cycle by means of background colours.
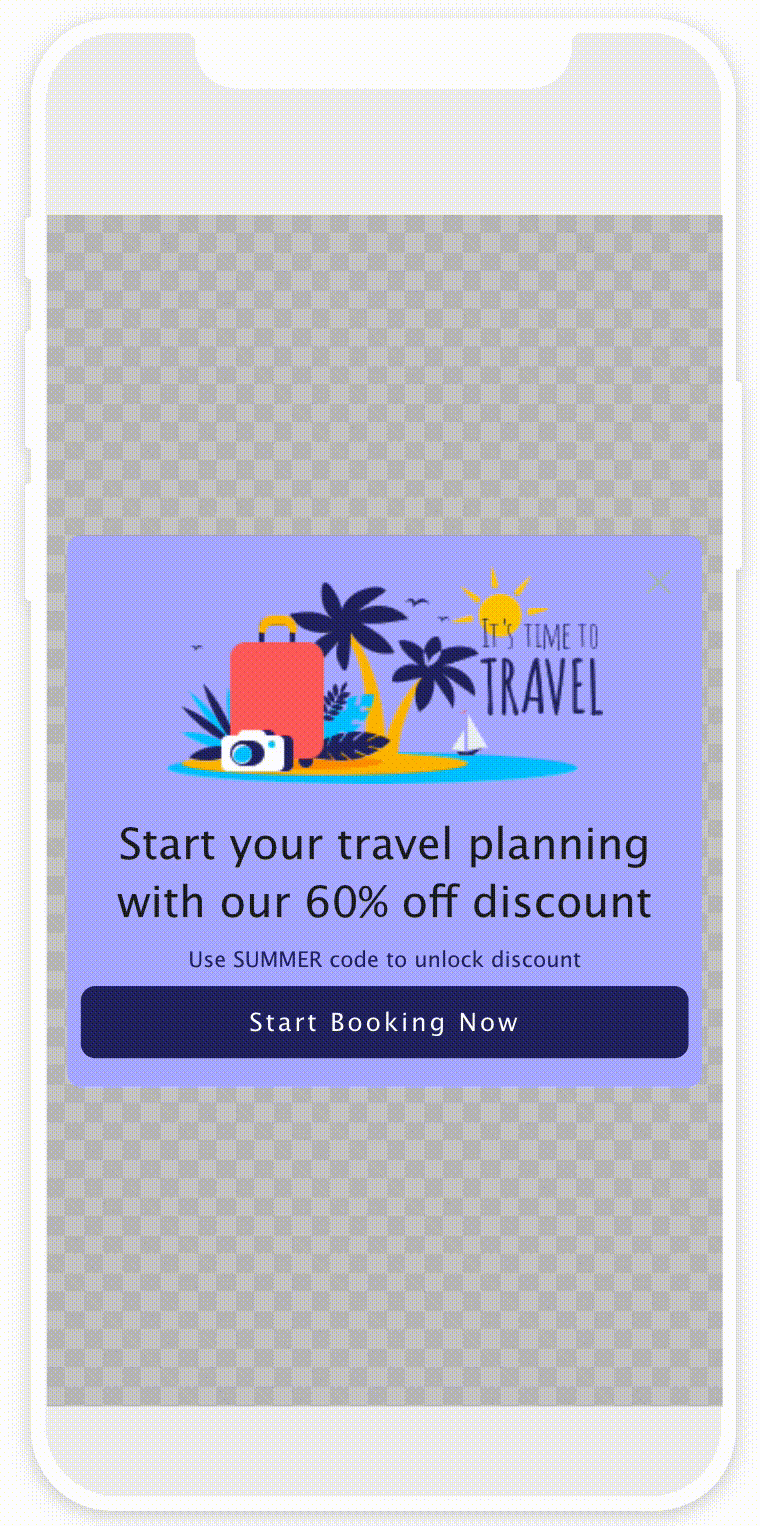
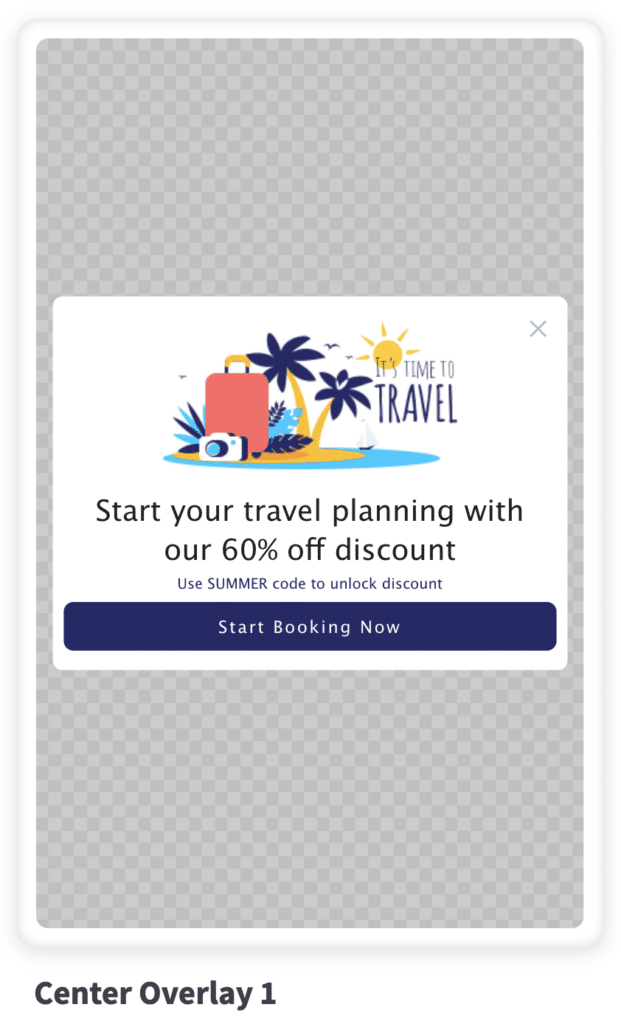
For this instance, use the Heart Overlay 1 artistic from the Department dashboard’s Journeys creatives part.
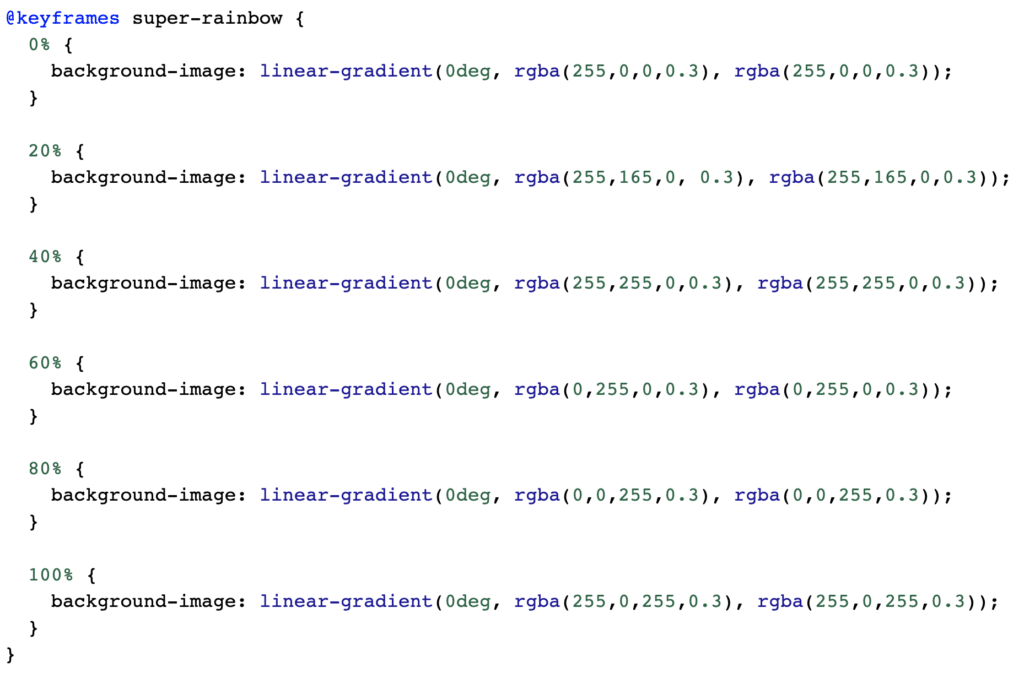
Right here’s create a @keyframes rule named super-rainbow. Inside, you’ll be working with keyframes at 0%, 20%, 40%, 60%, 80%, and 100% by means of the animation. You’ll edit the background-image property and provide a linear gradient at 0 diploma rotation, after which specify the RGBA colours of the rainbow with an opacity of 0.3. This manner, the colours aren’t too opaque or overwhelming on the banner.
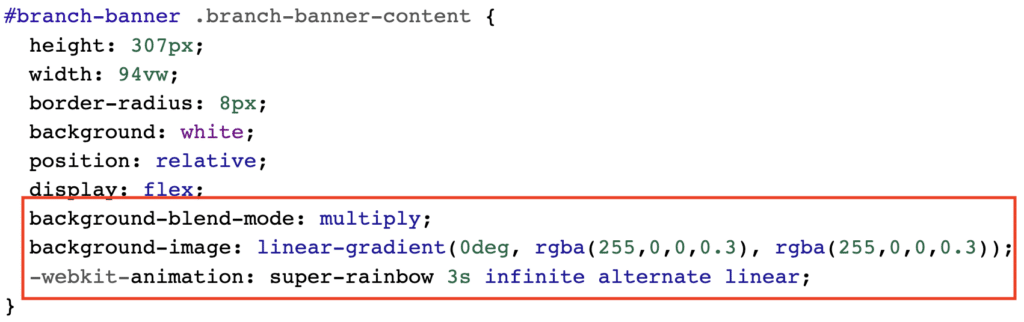
Now it’s time to use the animation to the banner. Go to the branch-banner-content. Assign it a background-blend-mode of multiply and a background-image of a linear-gradient beginning with a coloration of pink at a 0.3 opacity. Subsequent, add the -webkit-animation property specifying the animation identify of super-rainbow, length of three seconds, iteration rely of infinite, and a worth of alternate linear. When you do this, it’s best to see the background of your banner cycle by means of the assorted colours.
Get granular management over your good banners
Now you should utilize the CSS editor on the Department dashboard to get granular management over how your good banners are stylized. By understanding the totally different components that make up a Department Journeys banner, you’ll be able to create compelling banners for person acquisition and reengagement. You possibly can even use CSS code so as to add light-weight animations to your Journeys banner, making them much more partaking for customers.